March 17, 2018
Bloggers take the coolest shots, no doubts. I get questions about my photography constantly and the funny thing is- I’m not even that great at it, it’s all in the editing. Want to learn how to edit photos like a blogger? Keep on reading…
What Is Adobe Lightroom and Why I Should Start Using It?
I hear you, every new term can sound a bit scary, but I can assure you- Adobe Lightroom is going to make your life so much easier!
Lightroom is an image management and editing program also developed by Adobe, the same folks who created Photoshop. Using Lightroom, bloggers are able to work through their images from import, to sorting and organization, to processing, and finally all the way to share with the online world. It is so easy to use and you don’t need to be tech-savvy to set it all up.
Here are just some of the things you can use Lightroom for:
- Image compression (make your images load faster when uploaded to your blog)
- Image management (organize your photos in one place)
- File conversions (convert your raw files to jpeg, png or whatever you need)
- Keeping best image quality (no matter the format)
- Retouching (to make your images look exactly like pro bloggers)
- + so much more!
If you’re a blogger, you need to invest in a proper image editing tool. The great news is, the use signing up for Lightroom isn’t that pricey and you can cancel your subscription at any point! Although I really think you will be using it for years!!
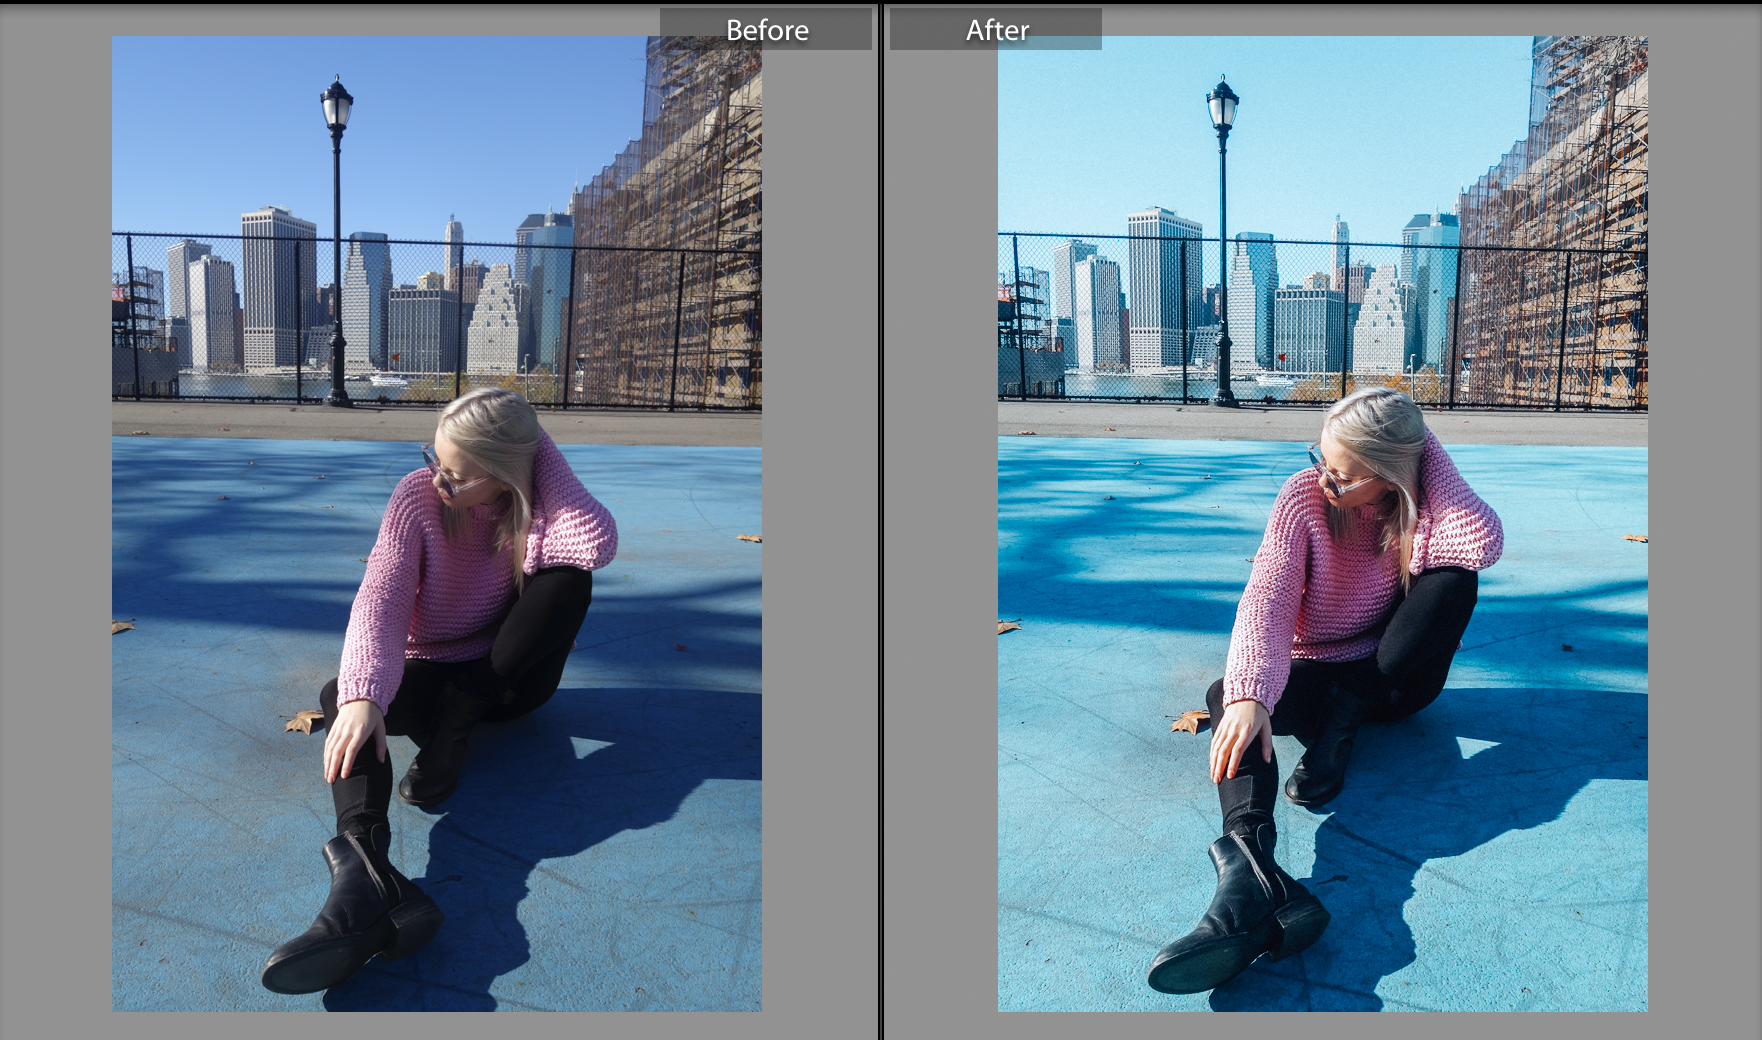
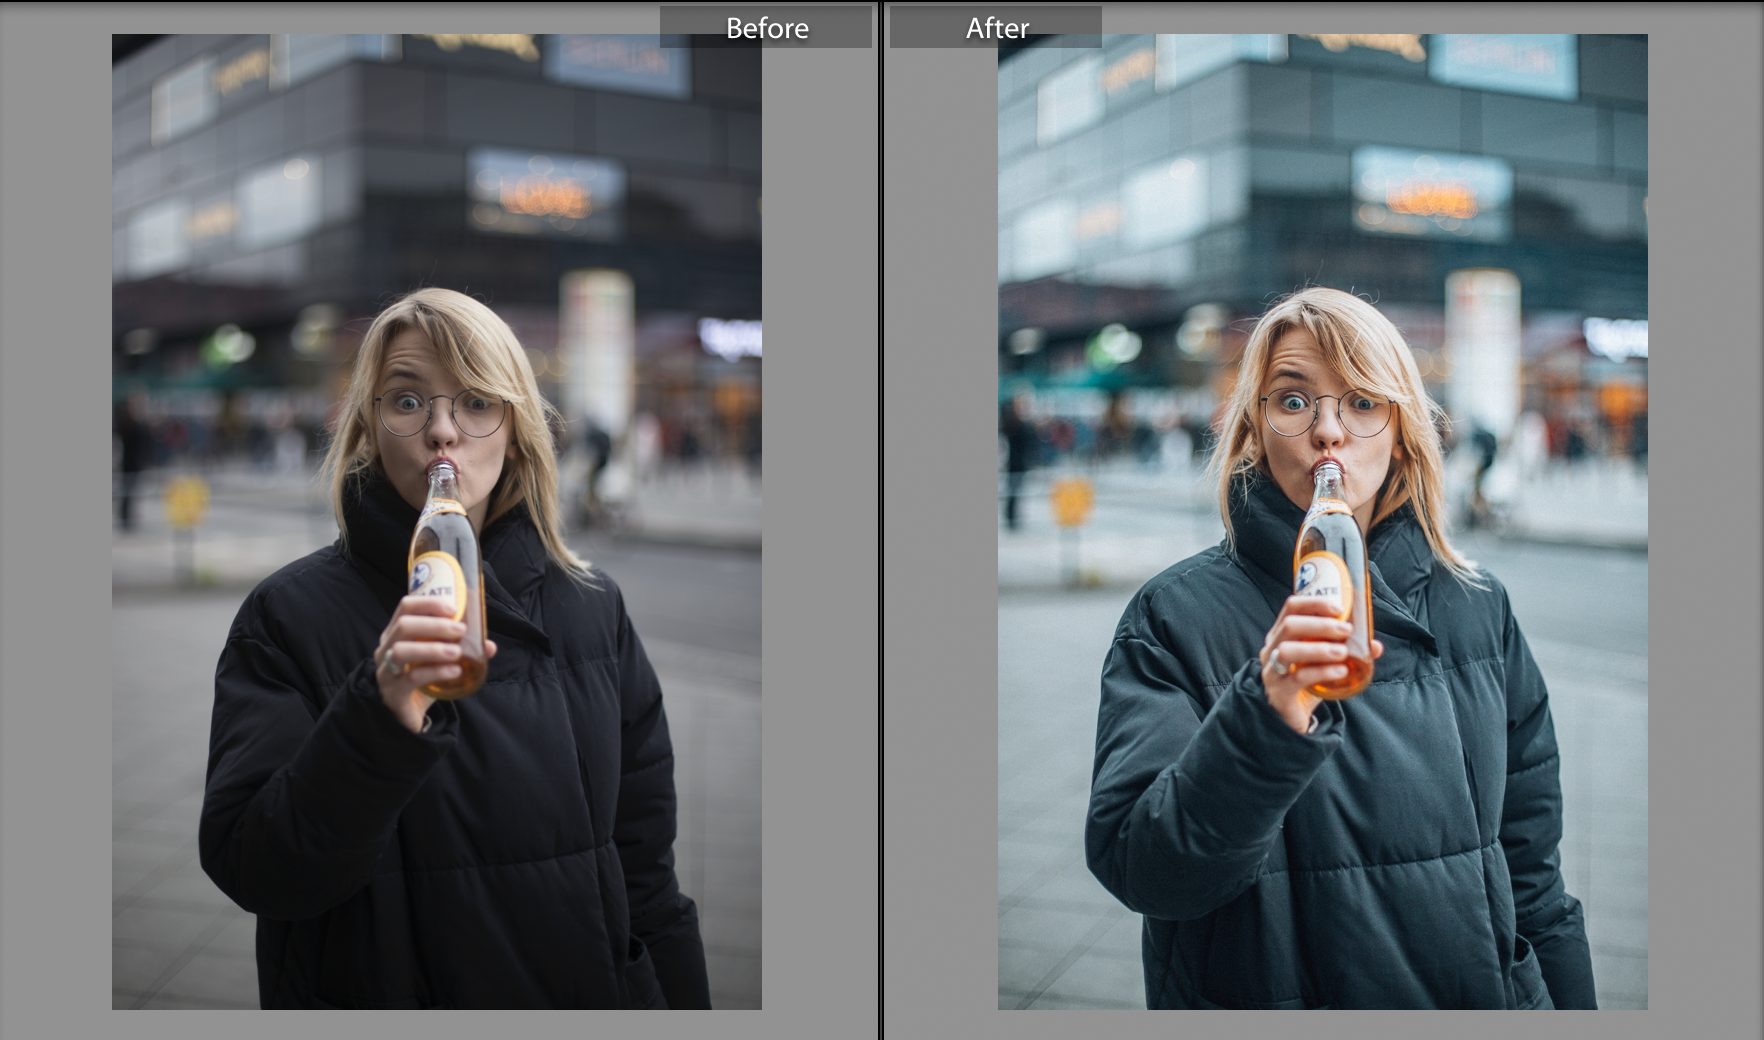
The above is one of my images edited with Lightroom! See how brighter and more professional after shot looks? I will show you exactly how you can improve your images this way, so follow this tutorial carefully! Let’s do this!
#1 Get Adobe Lightroom
Simply sign up for Adobe Photography Plan and download Lightroom to your computer. Follow simple steps to install it and once you do- proceed to the next step…
#2 Get Lightroom Presets
I’m not going to bother you with all the fuss about different settings, simply because I don’t think you need to worry about that!
What you should do instead is find premade presets that fit your style, upload them on your freshly installed Lightroom and improve your editing skills in seconds! Seriously, it is THAT simple!
I personally love using Presets By Mel for achieving the style that I like. Or you can also check out my friend Ugne that just launched her own presets shop. Perfect if you’re after those dreamy, yellow tones!
The presets that you use will vary on the images that you’ve taken, so make sure to find a few that you enjoy using and stick with them to achieve the sleek editing style.
For now, pick from any of the presets mentioned above or check out Presets Love for some free ones!
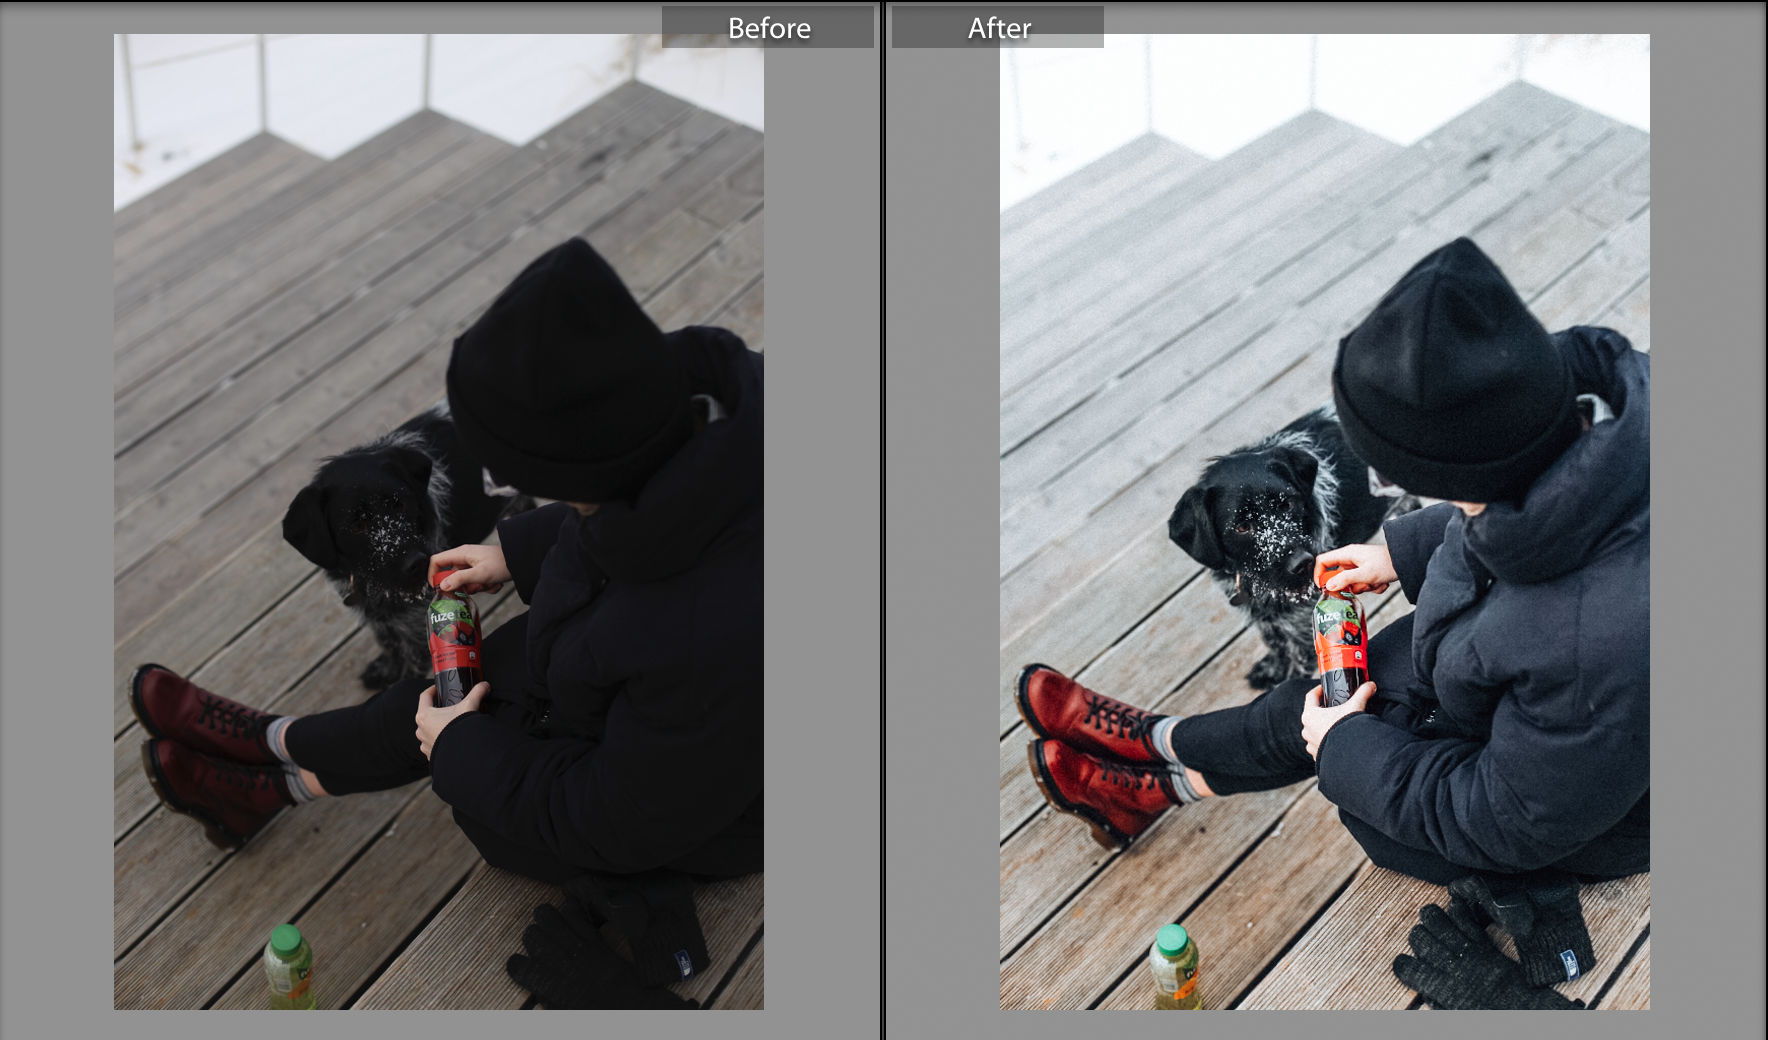
#3 Import Your Presets To Lightroom
Just follow these simple steps to import your presets into your Lightroom application:
How to Install Lightroom 4, 5, 6 & CC Presets For Windows:
- Open Lightroom
- Go to: Edit • Preferences • Presets
- Click on the box titled: Show Lightroom Presets Folder
- Double click on Lightroom
Double click on Develop Presets - Copy the folder(s) of your presets into the Develop Presets folder
- Restart Lightroom
How to Install Lightroom 4, 5, 6 & CC Presets For Mac:
- Open Lightroom
- Go to: Lightroom (Dialogue) • Preferences • Presets
- Click on the box titled: Show Lightroom Presets Folder
- Double click on Lightroom
- Double click on Develop Presets
- Copy the folder(s) of your presets into Develop Presets folder
- Restart Lightroom
That was quick, huh? I told you!
Now, let’s get to the fun part and start making changes to your pictures!
#4 Start Editing
You should now see your uploaded presets under DEVELOP area in your Lightroom. Import your images and start editing!
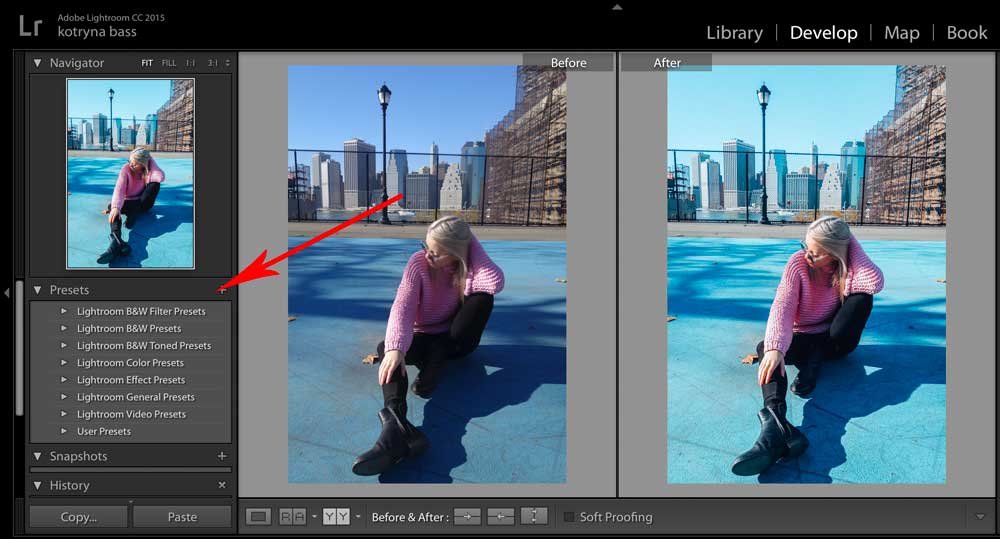
It’s really as simple as choosing your chosen preset and double-clicking on its title to apply the changes to your chosen image. You can also adjust the brightness a bit to make it fit your picture best, but don’t make too many changes, you still want your images to look natural!
Once you’re happy with your image- export it and start sharing with your audience! I bet you’re going to get some nice feedback!
Let me know if you just started using Lightroom and feel free to share a link to your blog/Instagram for us all to check out your new editing skills!
How To Edit Photos Like A Blogger Using Lightroom Presets
I am Kotryna Bass & I've tested most of the ways to make money online, so you wouldn't have to.
Back in 2012, I began my journey of selling digital products online. Since then, I have created several design and education brands using my personal websites and ETSY. I also started an e-commerce brand from scratch, reaching 500k in revenue. Through this experience, I learned all the tricks of marketing niche products online and making a profit without feeling overwhelmed. Let me show you what I've learned!
About Kotryna:
I am a digital products seller with over 10 years of experience! They have built multiple design and education brands, as well as a successful 7-figure e-commerce business from scratch. Get ready to learn from their wealth of knowledge in online marketing and profit-making.
LEARN MORE
Comments will load here