March 17, 2018
Pinterest can be a magical tool when it comes to bringing traffic to your blog. To me personally, it’s one of my biggest sources of referral traffic & with only a few tricks I get new readers coming to my blog from Pinterest daily. Creating outstanding graphics that will help you stand out from the crowd is very important when it comes to succeeding on Pinterest. Let me show you exactly how I create my Pinterest images using Adobe Photoshop. Just follow this step by step tutorial!
What Is Adobe Photoshop and Why I Should Start Using It?
I hear you, every new term can sound a bit scary, but I can assure you- Adobe Photoshop is going to make your life so much easier!
Adobe Photoshop is a software that is extensively used for raster image editing, graphic design and digital art. It is so easy to use and you don’t need to be tech savvy to set it all up.
Here are just some of the things you can use Photoshop for:
- Image compression (make your images load faster when uploaded to your blog)
- Working with graphics (it provides powerful editing tools, that when combined, are capable of just about anything)
- File conversions (convert your raw files to jpeg, png or whatever you need)
- Keeping best image quality (no matter the format)
- Retouching (improve image brightness/ colours etc)
- + so much more!
If you’re a blogger, Photoshop will come in super handy in many areas. The great news is, signing up for Photoshop isn’t that pricey and you can cancel your subscription at any point! Although I really think you will be using it for years!
Most importantly, Photoshop will allow you to brand your blog posts and create those outstanding Pinterest images that will help you bring all that awesome traffic to your blog. Let’s just follow the steps bellow together!
#1 Get Adobe Photoshop
Simply sign up for Adobe Photography Plan and download Photoshop to your computer. Follow simple steps to install it and once you do- proceed to the next step…
#2 Download Our Free Pinterest Image Template
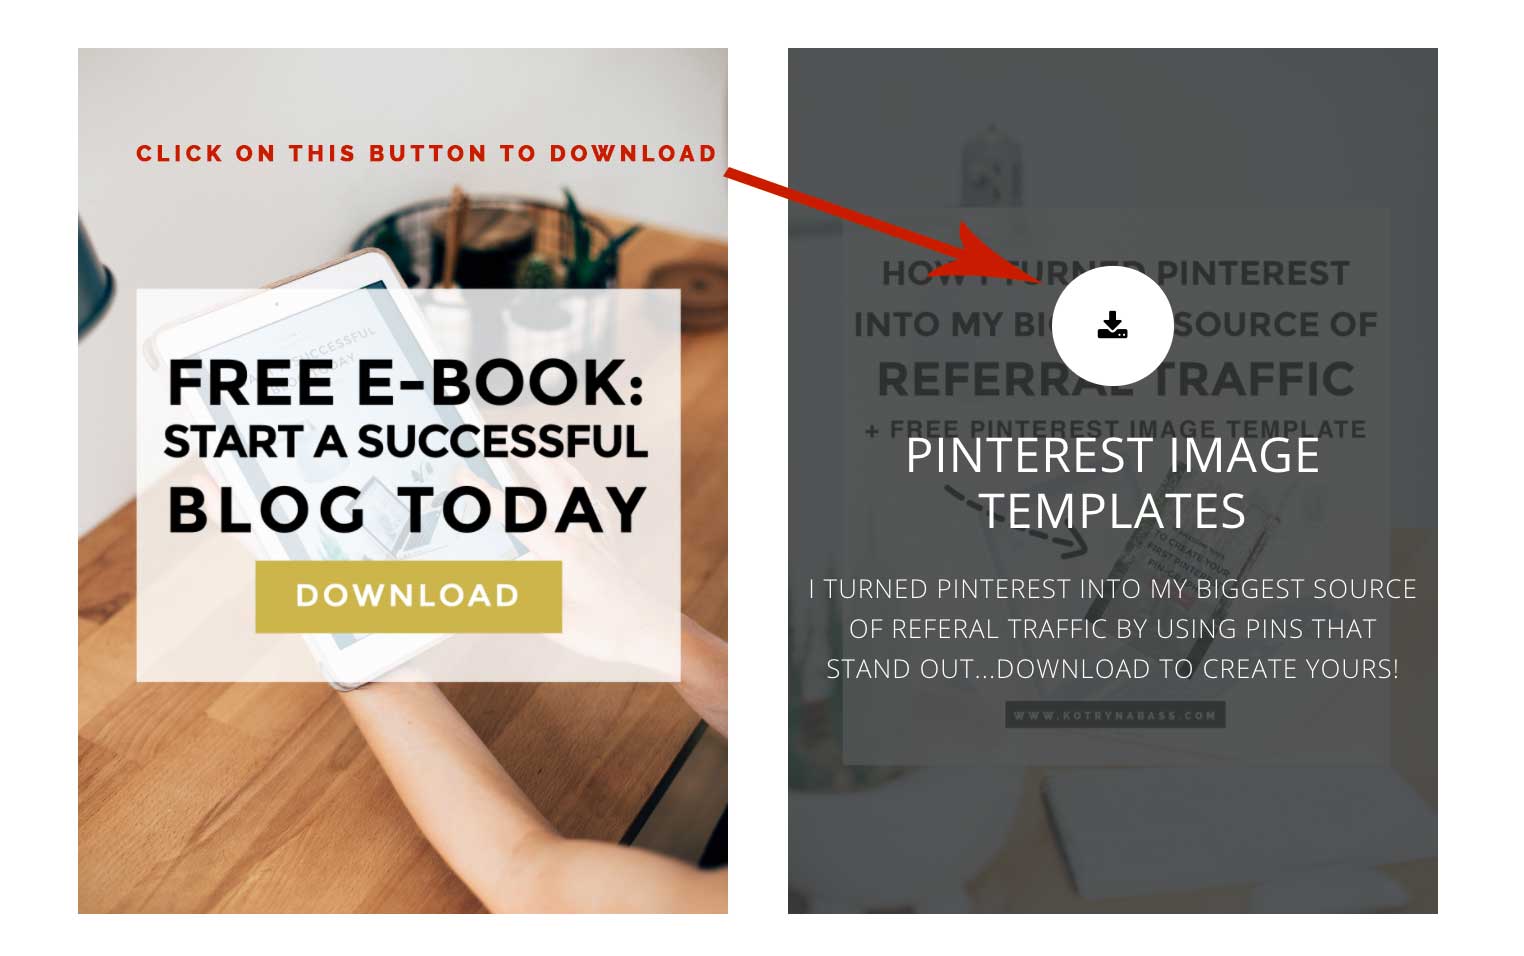
Lucky you, I’ve created a Free Pinterest Image Template that will allow you to create your first graphics very easily. Simply sign up for our newsletter and get access to our Free Resources Library. You will receive an e-mail with all the details once you’ve subscribed. It will give you a password for singing in to our library and you will have to download a .psd file from there.
#3 Edit The Template In Photoshop
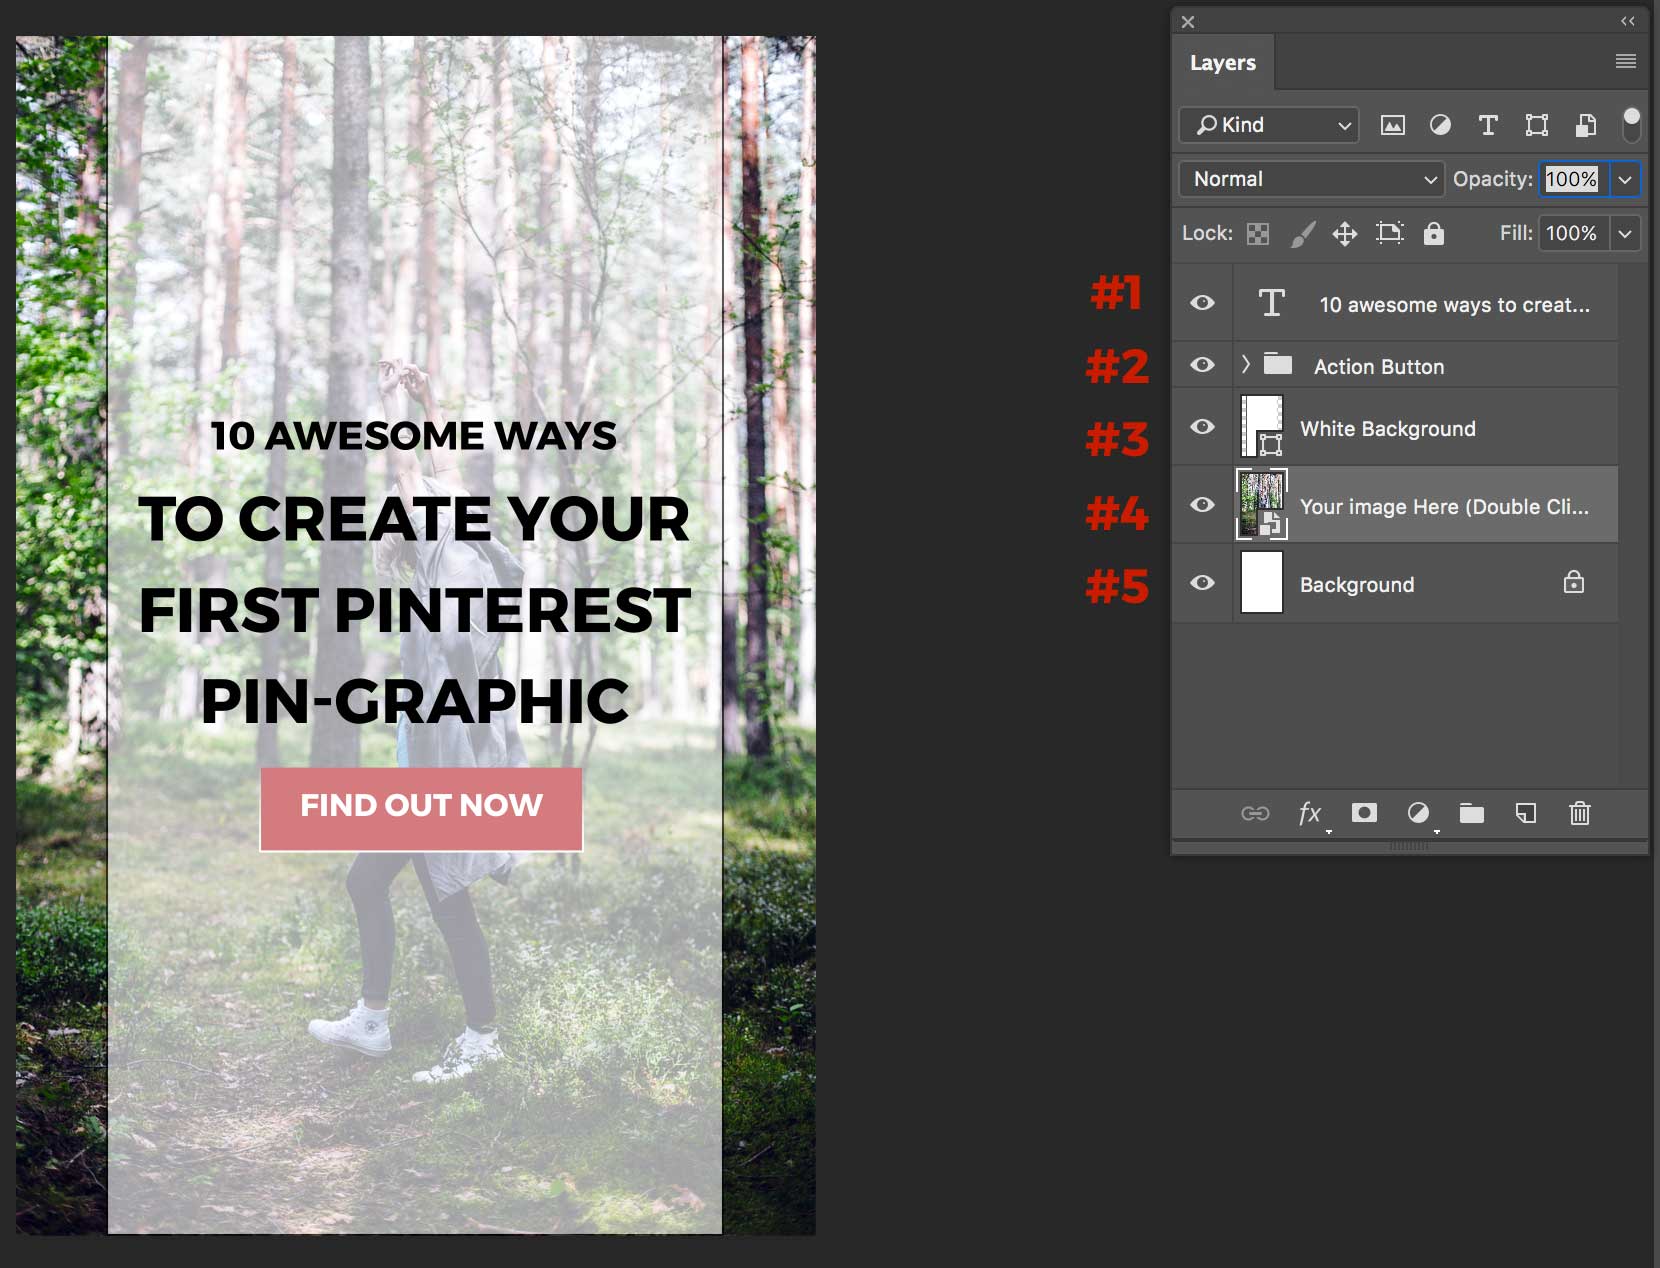
Once you’ve downloaded the template, double-click on the file and it should open itself in Photoshop. We will be working with layers here, take a look at the screenshot below:

Editing the template is pretty easy as you already have everything ready for you. Just to explain the layers you need to edit:
- You should use this layer to display your post title, make sure to play around with different fonts/font sizes here. Simply click on the text and you should be able to edit it straight on the template.
- Expand the Action Button layer to edit the colour of the button as well as edit the text. This should be engaging promo text that would encourage your readers to click & read the post.
- This white background layer allows you to really make your title stand out. You can double-click on it to change its colour or click CMD (ctrl) + T in order to change the size of it.
- Double click on Layer No. 4 in order to change your background Image. It’s best to use abstract images or at least avoid using portraits here.
- Background layer should stay as it is. You don’t really need to edit in order to create this graphic.
Here it is! You’ve successfully edited your first Pinterest Image. Are you ready to share it with the public?
#4 Export & Upload
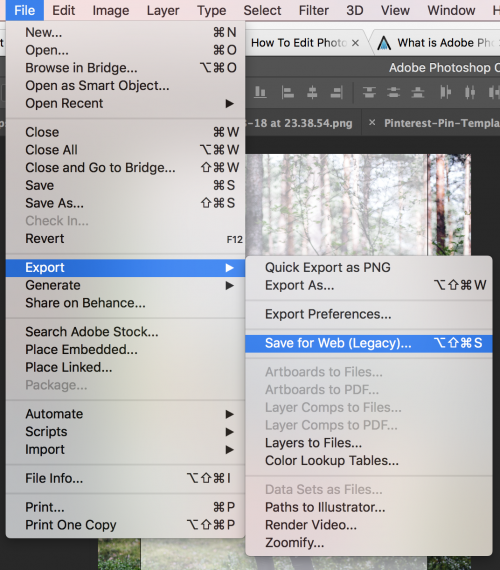
Once you’ve edited all the layers, make sure to export your image. I personally try to save all of my images I use online ‘as for web’, so they keep the best quality, but are still able to load fast.
For this, click on FILE ->EXPORT->SAVE FOR WEB and save it on your computer!

Once you have saved the file, you should be ready to upload it to your blog or straight to Pinterest!
That was quick, huh?
Hope you’ve found this tutorial useful! Let me know if you end up using our template and have success editing it in Photoshop, I’d love to see your images! Feel free to leave a link to your most recent pin in the comments!

How To Create Pinterest Images In Photoshop (+ Free Template)
I am Kotryna Bass & I've tested most of the ways to make money online, so you wouldn't have to.
Back in 2012, I began my journey of selling digital products online. Since then, I have created several design and education brands using my personal websites and ETSY. I also started an e-commerce brand from scratch, reaching 500k in revenue. Through this experience, I learned all the tricks of marketing niche products online and making a profit without feeling overwhelmed. Let me show you what I've learned!
About Kotryna:
I am a digital products seller with over 10 years of experience! They have built multiple design and education brands, as well as a successful 7-figure e-commerce business from scratch. Get ready to learn from their wealth of knowledge in online marketing and profit-making.
LEARN MORE

Comments will load here